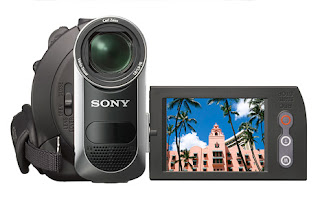
Step 1. Capture DV from Mini DV Aee
Generally we call the process of transferring video from your camcorder or other video sources to your computer capturing. The function of DV capturing is integrated with DVD Burning Xpress.Before the capture, camcorder need to open and switch to VCR mode. Click the'DV capture 'button on the main screen, DV capture dialog box will appear. In this dialog box, you can see the next DV screen and some playback control buttons. You can use these buttons control the camera's DV rewind or pre-recorded the exact location, you have to start capturing. Then click on 'Start Capture' button to start. In the position you want to stop capture, you can click on 'Stop Capture button. After the film has been successfully captured, the video file will be saved in an uncompressed AVI file format the hard drive. You can use other software to process the AVI files, and capture the DV tape again in the future. Click 'OK' button to close the dialog box after the capture.
Step 2. Organize Video sources
After capturing from DV tape, the video staff will be put on the video sources list in the main screen. The following functions are available for video sources:Trim Video. You can choose which video segment should be put on the DVD disc and which should not. Click the ‘Trim Video’ button on the right side: When you are playing the video file, click the ‘Start Point’ button at the position where you want to keep, and click the ‘End point’ at the position where you wouldn’t keep. The segment you want to keep will be marked as green color in the video position bar.
Transition Effects: Transition effects can be added between any video clips, which make the output DVD disc look very professional. More than 150 transition effects are integrated in DVD Burning Xpress. Clicking the ‘Transition’ button on the right side will launch the transition setting dialog as left. In this dialog, you can select a transition from the transition list or let the software to choose randomly from the transition effects. Transition duration can also be changed.
Change video orders: By clicking the ‘Move Up’, ’Move Down’ or ‘Remove’ button on the right side, The order of video clips can be changed. You can decide which video clip is presented first and which one comes later.
Add background music: Background music can be mixed to the source video. By adding background music, your video disc will impress your friends deeply. Most music formats, namely such as MP3. WMA, WAV etc, are supported. You can click the‘Properties’ button to adjust the background music volume or enable/disable the fade-in/out features. Double-clicking the music file in the background music list will let you preview the music file.
Step 3. Burn Video to DVD Disc
Click the ‘Burn DVD Disc’ button in the main screen window. In this dialog, you can change the output disc format, select PAL or NTSC TV system. Inserting an empty DVD-R/RW, DVD+R/RW disc into your DVD burner and clicking the‘Burn Now!’ button will let you burn disc. The burning process will encode the video files into MPEG-2 format and write it to DVD disc. The totally encoding and burning time varies from several minutes to a few hours. It depends on the length of the video source and the hardware configuration of your computer. As tested on the P4-2.0G CPU with 512M RAM, burning a 30 minutes video normally takes about 2 hours.Some Tips of Converting DV to DVD:
1. The free trial version of DVD Burning Xpress has a 10 minutes limitation and you may need to order a license code to burn more than 10 minutes video.2. Capturing DV and encoding video files consume very large disc space. For example, to successfully burn a whole DV tape to a DVD disc may require as large as 25G bytes free disc space.
3. A 1394 card is required to connect camcorder with your computer. You may need to buy a 1394 card. DVD-R/RW has better compatibility with DVD player than DVD+R/RW disc, especially for some older DVD player models.
Now begin to enjoy convert. By the way, what kind of DV are you using? Do you ever be told a dv named aee mini dv? As far as I know,it looks looks very small and cute and very convenient to take and put any place you want.
http://gloria06.wordpress.com/2010/07/03/3-steps-3-tips-of-converting-dv-to-dvd/
No comments:
Post a Comment